2017-11-02 19:52:42 -04:00
**DO NOT READ THIS FILE ON GITHUB, GUIDES ARE PUBLISHED ON http://guides.rubyonrails.org.**
2017-12-15 00:17:19 -05:00
Active Storage Overview
=======================
2017-11-02 19:52:42 -04:00
2017-11-18 20:24:37 -05:00
This guide covers how to attach files to your Active Record models.
2017-11-02 19:52:42 -04:00
After reading this guide, you will know:
2017-11-18 20:24:37 -05:00
* How to attach one or many files to a record.
* How to delete an attached file.
* How to link to an attached file.
* How to use variants to transform images.
* How to generate an image representation of a non-image file, such as a PDF or a video.
* How to send file uploads directly from browsers to a storage service,
bypassing your application servers.
2017-11-16 22:07:10 -05:00
* How to clean up files stored during testing.
2017-12-14 22:08:33 -05:00
* How to implement support for additional storage services.
2017-11-02 19:52:42 -04:00
--------------------------------------------------------------------------------
2017-11-18 20:24:37 -05:00
What is Active Storage?
-----------------------
2017-11-02 19:52:42 -04:00
2017-11-18 20:24:37 -05:00
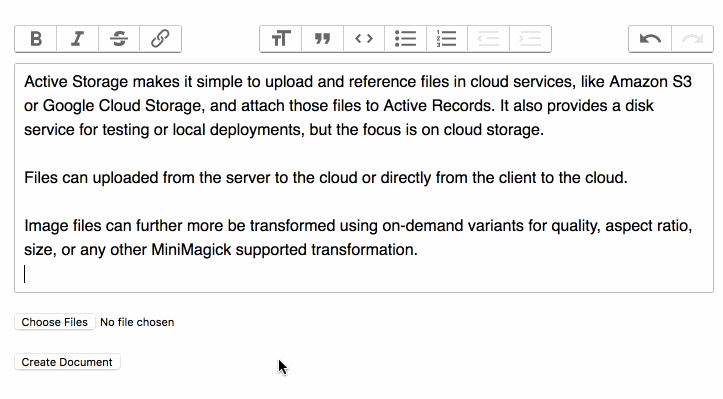
Active Storage facilitates uploading files to a cloud storage service like
Amazon S3, Google Cloud Storage, or Microsoft Azure Storage and attaching those
files to Active Record objects. It comes with a local disk-based service for
development and testing and supports mirroring files to subordinate services for
backups and migrations.
2017-11-09 11:51:14 -05:00
2017-11-18 20:24:37 -05:00
Using Active Storage, an application can transform image uploads with
[ImageMagick ](https://www.imagemagick.org ), generate image representations of
non-image uploads like PDFs and videos, and extract metadata from arbitrary
files.
2017-11-09 11:51:14 -05:00
2017-11-18 20:24:37 -05:00
## Setup
2017-11-09 11:51:14 -05:00
2017-11-30 11:42:04 -05:00
Active Storage uses two tables in your application’
`active_storage_blobs` and `active_storage_attachments` . After upgrading your
application to Rails 5.2, run `rails active_storage:install` to generate a
migration that creates these tables. Use `rails db:migrate` to run the
migration.
2017-11-09 11:51:14 -05:00
2017-11-30 11:42:04 -05:00
Declare Active Storage services in `config/storage.yml` . For each service your
application uses, provide a name and the requisite configuration. The example
2017-12-15 18:49:18 -05:00
below declares three services named `local` , `test` , and `amazon` :
2017-11-30 11:42:04 -05:00
```yaml
local:
service: Disk
root: < %= Rails.root.join("storage") %>
test:
service: Disk
root: < %= Rails.root.join("tmp/storage") %>
2017-12-15 18:49:18 -05:00
amazon:
2017-11-30 11:42:04 -05:00
service: S3
access_key_id: ""
secret_access_key: ""
```
Tell Active Storage which service to use by setting
`Rails.application.config.active_storage.service` . Because each environment will
likely use a different service, it is recommended to do this on a
per-environment basis. To use the disk service from the previous example in the
development environment, you would add the following to
2017-12-15 02:33:38 -05:00
`config/environments/development.rb` :
2017-11-30 11:42:04 -05:00
```ruby
# Store files locally.
config.active_storage.service = :local
```
2017-12-15 18:49:18 -05:00
To use the Amazon S3 service in production, you add the following to
2017-11-30 11:42:04 -05:00
`config/environments/production.rb` :
```ruby
2017-12-15 18:49:18 -05:00
# Store files on Amazon S3.
config.active_storage.service = :amazon
2017-11-18 20:24:37 -05:00
```
2017-11-16 22:07:10 -05:00
2017-11-30 11:42:04 -05:00
Continue reading for more information on the built-in service adapters (e.g.
`Disk` and `S3` ) and the configuration they require.
2017-11-18 20:24:37 -05:00
### Disk Service
2017-12-14 22:08:33 -05:00
2017-12-04 23:56:16 -05:00
Declare a Disk service in `config/storage.yml` :
2017-11-18 20:24:37 -05:00
2017-12-28 17:17:50 -05:00
```yaml
2017-11-18 20:24:37 -05:00
local:
service: Disk
root: < %= Rails.root.join("storage") %>
2018-01-16 20:32:02 -05:00
```
2017-11-18 20:24:37 -05:00
### Amazon S3 Service
2017-12-14 22:08:33 -05:00
2017-12-04 23:56:16 -05:00
Declare an S3 service in `config/storage.yml` :
2017-11-18 20:24:37 -05:00
2017-12-28 17:17:50 -05:00
```yaml
2017-12-15 18:49:18 -05:00
amazon:
2017-11-18 20:24:37 -05:00
service: S3
access_key_id: ""
secret_access_key: ""
region: ""
bucket: ""
```
2017-12-28 17:11:15 -05:00
Add the [`aws-sdk-s3` ](https://github.com/aws/aws-sdk-ruby ) gem to your `Gemfile` :
2017-11-18 20:24:37 -05:00
2017-12-28 17:17:50 -05:00
```ruby
2017-11-18 20:24:37 -05:00
gem "aws-sdk-s3", require: false
```
2017-12-14 22:09:48 -05:00
2018-02-21 07:48:49 -05:00
NOTE: The core features of Active Storage require the following permissions: `s3:ListBucket` , `s3:PutObject` , `s3:GetObject` , and `s3:DeleteObject` . If you have additional upload options configured such as setting ACLs then additional permissions may be required.
2018-03-19 11:25:40 -04:00
NOTE: If you want to use environment variables, standard SDK configuration files, profiles,
IAM instance profiles or task roles, you can omit the `access_key_id` , `secret_access_key` ,
and `region` keys in the example above. The Amazon S3 Service supports all of the
authentication options described in the [AWS SDK documentation]
(https://docs.aws.amazon.com/sdk-for-ruby/v3/developer-guide/setup-config.html).
2017-11-18 20:24:37 -05:00
### Microsoft Azure Storage Service
2017-12-14 22:08:33 -05:00
2017-12-04 23:56:16 -05:00
Declare an Azure Storage service in `config/storage.yml` :
2017-11-18 20:24:37 -05:00
2017-12-28 17:17:50 -05:00
```yaml
2017-11-30 11:42:04 -05:00
azure:
2017-11-18 20:24:37 -05:00
service: AzureStorage
storage_account_name: ""
storage_access_key: ""
container: ""
```
2017-12-28 17:11:15 -05:00
Add the [`azure-storage` ](https://github.com/Azure/azure-storage-ruby ) gem to your `Gemfile` :
2017-11-18 20:24:37 -05:00
2017-12-28 17:17:50 -05:00
```ruby
2017-11-18 20:24:37 -05:00
gem "azure-storage", require: false
```
### Google Cloud Storage Service
2017-12-14 22:08:33 -05:00
2017-12-04 23:56:16 -05:00
Declare a Google Cloud Storage service in `config/storage.yml` :
2017-11-18 20:24:37 -05:00
2017-12-28 17:17:50 -05:00
```yaml
2017-11-30 11:42:04 -05:00
google:
2017-11-18 20:24:37 -05:00
service: GCS
2017-12-28 17:17:50 -05:00
credentials: < %= Rails.root.join("path/to/keyfile.json") %>
project: ""
bucket: ""
```
Optionally provide a Hash of credentials instead of a keyfile path:
```yaml
google:
service: GCS
credentials:
type: "service_account"
project_id: ""
private_key_id: < %= Rails.application.credentials.dig(:gcs, :private_key_id) %>
private_key: < %= Rails.application.credentials.dig(:gcs, :private_key) %>
client_email: ""
client_id: ""
auth_uri: "https://accounts.google.com/o/oauth2/auth"
token_uri: "https://accounts.google.com/o/oauth2/token"
auth_provider_x509_cert_url: "https://www.googleapis.com/oauth2/v1/certs"
2017-11-18 20:24:37 -05:00
client_x509_cert_url: ""
project: ""
bucket: ""
```
2017-12-28 17:11:15 -05:00
Add the [`google-cloud-storage` ](https://github.com/GoogleCloudPlatform/google-cloud-ruby/tree/master/google-cloud-storage ) gem to your `Gemfile` :
2017-11-18 20:24:37 -05:00
2017-12-28 17:17:50 -05:00
```ruby
2018-01-27 20:38:53 -05:00
gem "google-cloud-storage", "~> 1.8", require: false
2017-11-18 20:24:37 -05:00
```
2017-11-16 22:07:10 -05:00
2017-11-18 20:24:37 -05:00
### Mirror Service
2017-11-16 22:07:10 -05:00
2017-12-08 16:44:59 -05:00
You can keep multiple services in sync by defining a mirror service. When a file
is uploaded or deleted, it's done across all the mirrored services. Mirrored
services can be used to facilitate a migration between services in production.
You can start mirroring to the new service, copy existing files from the old
service to the new, then go all-in on the new service. Define each of the
services you'd like to use as described above and reference them from a mirrored
service.
2017-11-16 22:07:10 -05:00
2017-12-28 17:17:50 -05:00
```yaml
2017-11-18 20:24:37 -05:00
s3_west_coast:
service: S3
access_key_id: ""
secret_access_key: ""
region: ""
bucket: ""
s3_east_coast:
service: S3
access_key_id: ""
secret_access_key: ""
region: ""
bucket: ""
production:
service: Mirror
primary: s3_east_coast
mirrors:
- s3_west_coast
2017-11-16 22:07:10 -05:00
```
2017-11-30 12:19:57 -05:00
NOTE: Files are served from the primary service.
2017-12-29 19:56:13 -05:00
Attaching Files to Records
--------------------------
2017-11-09 11:51:14 -05:00
2017-12-04 23:56:16 -05:00
### `has_one_attached`
2017-11-09 11:51:14 -05:00
2017-12-04 23:56:16 -05:00
The `has_one_attached` macro sets up a one-to-one mapping between records and
files. Each record can have one file attached to it.
2017-12-16 00:04:54 -05:00
For example, suppose your application has a `User` model. If you want each user to
2017-12-04 23:56:16 -05:00
have an avatar, define the `User` model like this:
2017-12-28 17:17:50 -05:00
```ruby
2017-11-09 11:51:14 -05:00
class User < ApplicationRecord
has_one_attached :avatar
end
2017-12-04 23:56:16 -05:00
```
2017-11-09 11:51:14 -05:00
2017-12-04 23:56:16 -05:00
You can create a user with an avatar:
2017-11-09 11:51:14 -05:00
2017-12-28 17:17:50 -05:00
```ruby
2017-12-04 23:56:16 -05:00
class SignupController < ApplicationController
def create
2017-12-16 00:04:54 -05:00
user = User.create!(user_params)
2017-12-04 23:56:16 -05:00
session[:user_id] = user.id
redirect_to root_path
2017-11-09 11:51:14 -05:00
end
2017-12-04 23:56:16 -05:00
private
def user_params
params.require(:user).permit(:email_address, :password, :avatar)
end
2017-11-09 11:51:14 -05:00
end
```
2017-12-04 23:56:16 -05:00
Call `avatar.attach` to attach an avatar to an existing user:
```ruby
2018-06-01 02:45:12 -04:00
user.avatar.attach(params[:avatar])
2017-12-04 23:56:16 -05:00
```
Call `avatar.attached?` to determine whether a particular user has an avatar:
```ruby
2018-06-01 02:45:12 -04:00
user.avatar.attached?
2017-12-04 23:56:16 -05:00
```
### `has_many_attached`
The `has_many_attached` macro sets up a one-to-many relationship between records
and files. Each record can have many files attached to it.
For example, suppose your application has a `Message` model. If you want each
2017-12-16 00:04:54 -05:00
message to have many images, define the `Message` model like this:
2017-11-09 11:51:14 -05:00
```ruby
class Message < ApplicationRecord
has_many_attached :images
end
```
2017-12-04 23:56:16 -05:00
You can create a message with images:
2017-11-09 11:51:14 -05:00
```ruby
class MessagesController < ApplicationController
def create
2017-11-21 13:27:02 -05:00
message = Message.create!(message_params)
2017-11-09 11:51:14 -05:00
redirect_to message
end
2017-11-21 13:27:02 -05:00
private
def message_params
params.require(:message).permit(:title, :content, images: [])
end
2017-11-09 11:51:14 -05:00
end
```
2017-12-04 23:56:16 -05:00
Call `images.attach` to add new images to an existing message:
```ruby
@message .images.attach(params[:images])
```
2017-12-08 16:44:59 -05:00
Call `images.attached?` to determine whether a particular message has any images:
2017-12-04 23:56:16 -05:00
```ruby
@message .images.attached?
```
2018-04-23 07:30:47 -04:00
### Attaching File/IO Objects
Sometimes you need to attach a file that doesn’
For example, you may want to attach a file you generated on disk or downloaded
from a user-submitted URL. You may also want to attach a fixture file in a
model test. To do that, provide a Hash containing at least an open IO object
and a filename:
```ruby
@message .image.attach(io: File.open('/path/to/file'), filename: 'file.pdf')
```
When possible, provide a content type as well. Active Storage attempts to
determine a file’
type you provide if it can’
```ruby
@message .image.attach(io: File.open('/path/to/file'), filename: 'file.pdf', content_type: 'application/pdf')
```
2018-05-06 11:25:05 -04:00
You can bypass the content type inference from the data by passing in
`identify: false` along with the `content_type` .
```ruby
@message .image.attach(
io: File.open('/path/to/file'),
filename: 'file.pdf',
content_type: 'application/pdf'
identify: false
)
```
2018-04-23 07:30:47 -04:00
If you don’ ’
file’
2017-12-29 19:56:13 -05:00
Removing Files
--------------
2017-11-09 11:51:14 -05:00
2017-11-16 22:07:10 -05:00
To remove an attachment from a model, call `purge` on the attachment. Removal
2017-11-21 13:29:41 -05:00
can be done in the background if your application is setup to use Active Job.
2017-11-18 20:24:37 -05:00
Purging deletes the blob and the file from the storage service.
2017-11-16 22:07:10 -05:00
2017-11-09 11:51:14 -05:00
```ruby
# Synchronously destroy the avatar and actual resource files.
user.avatar.purge
# Destroy the associated models and actual resource files async, via Active Job.
user.avatar.purge_later
```
2017-12-29 19:56:13 -05:00
Linking to Files
----------------
2017-11-16 22:07:10 -05:00
Generate a permanent URL for the blob that points to the application. Upon
access, a redirect to the actual service endpoint is returned. This indirection
2017-11-20 20:01:00 -05:00
decouples the public URL from the actual one, and allows, for example, mirroring
2017-11-16 22:07:10 -05:00
attachments in different services for high-availability. The redirection has an
HTTP expiration of 5 min.
2017-11-09 11:51:14 -05:00
```ruby
url_for(user.avatar)
```
2017-11-20 20:01:00 -05:00
To create a download link, use the `rails_blob_{path|url}` helper. Using this
2017-11-21 13:27:02 -05:00
helper allows you to set the disposition.
2017-11-20 20:01:00 -05:00
```ruby
2017-11-20 20:09:28 -05:00
rails_blob_path(user.avatar, disposition: "attachment")
2017-11-20 20:01:00 -05:00
```
2018-04-23 07:30:47 -04:00
If you need to create a link from outside of controller/view context (Background
jobs, Cronjobs, etc.), you can access the rails_blob_path like this:
```
Rails.application.routes.url_helpers.rails_blob_path(user.avatar, only_path: true)
```
Downloading Files
-----------------
2018-05-16 22:26:39 -04:00
Sometimes you need to process a blob after it’
it to a different format. Use `ActiveStorage::Blob#download` to read a blob’
binary data into memory:
2018-04-23 07:30:47 -04:00
```ruby
binary = user.avatar.download
```
2018-05-16 22:26:39 -04:00
You might want to download a blob to a file on disk so an external program (e.g.
a virus scanner or media transcoder) can operate on it. Use
`ActiveStorage::Blob#open` to download a blob to a tempfile on disk:
2018-04-23 07:30:47 -04:00
2018-05-17 18:19:18 -04:00
```ruby
2018-05-16 22:26:39 -04:00
message.video.open do |file|
system '/path/to/virus/scanner', file.path
2018-04-23 07:30:47 -04:00
# ...
end
```
2017-12-29 19:56:13 -05:00
Transforming Images
-------------------
2017-11-09 11:51:14 -05:00
2018-05-03 10:58:15 -04:00
To create a variation of the image, call `variant` on the `Blob` . You can pass
2018-04-23 15:06:06 -04:00
any transformation to the method supported by the processor. The default
2018-04-05 19:48:29 -04:00
processor is [MiniMagick ](https://github.com/minimagick/minimagick ), but you
can also use [Vips ](http://www.rubydoc.info/gems/ruby-vips/Vips/Image ).
2017-12-08 16:44:59 -05:00
2018-04-23 15:06:06 -04:00
To enable variants, add the `image_processing` gem to your `Gemfile` :
2017-12-08 16:44:59 -05:00
2017-12-28 17:17:50 -05:00
```ruby
2018-04-05 19:48:29 -04:00
gem 'image_processing', '~> 1.2'
2017-12-08 16:44:59 -05:00
```
2017-11-16 22:07:10 -05:00
2018-05-03 10:58:15 -04:00
When the browser hits the variant URL, Active Storage will lazily transform the
original blob into the specified format and redirect to its new service
2017-11-16 22:07:10 -05:00
location.
2017-11-09 11:51:14 -05:00
```erb
2018-04-23 15:04:35 -04:00
< %= image_tag user.avatar.variant(resize_to_fit: [100, 100]) %>
2018-04-05 19:48:29 -04:00
```
To switch to the Vips processor, you would add the following to
`config/application.rb` :
```ruby
# Use Vips for processing variants.
2018-04-22 17:40:42 -04:00
config.active_storage.variant_processor = :vips
2017-11-09 11:51:14 -05:00
```
2017-12-29 19:56:13 -05:00
Previewing Files
----------------
2017-12-14 22:08:33 -05:00
Some non-image files can be previewed: that is, they can be presented as images.
For example, a video file can be previewed by extracting its first frame. Out of
the box, Active Storage supports previewing videos and PDF documents.
2017-11-09 11:51:14 -05:00
```erb
< ul >
< % @message .files.each do |file| %>
< li >
2018-04-23 15:04:35 -04:00
< %= image_tag file.preview(resize_to_limit: [100, 100]) %>
2017-11-09 11:51:14 -05:00
< / li >
< % end %>
< / ul >
```
2017-11-20 21:11:04 -05:00
WARNING: Extracting previews requires third-party applications, `ffmpeg` for
video and `mutool` for PDFs. These libraries are not provided by Rails. You must
install them yourself to use the built-in previewers. Before you install and use
third-party software, make sure you understand the licensing implications of
doing so.
2017-12-29 19:56:13 -05:00
Direct Uploads
--------------
2017-11-09 11:51:14 -05:00
Active Storage, with its included JavaScript library, supports uploading
directly from the client to the cloud.
### Direct upload installation
1. Include `activestorage.js` in your application's JavaScript bundle.
Using the asset pipeline:
2017-11-30 12:19:57 -05:00
2017-11-09 11:51:14 -05:00
```js
//= require activestorage
2017-11-30 12:19:57 -05:00
2017-11-09 11:51:14 -05:00
```
2017-11-30 12:19:57 -05:00
2017-11-09 11:51:14 -05:00
Using the npm package:
2017-11-30 12:19:57 -05:00
2017-11-09 11:51:14 -05:00
```js
import * as ActiveStorage from "activestorage"
ActiveStorage.start()
```
2017-11-30 12:19:57 -05:00
2017-11-09 11:51:14 -05:00
2. Annotate file inputs with the direct upload URL.
```ruby
< %= form.file_field :attachments, multiple: true, direct_upload: true %>
```
3. That's it! Uploads begin upon form submission.
### Direct upload JavaScript events
| Event name | Event target | Event data (`event.detail`) | Description |
| --- | --- | --- | --- |
| `direct-uploads:start` | `<form>` | None | A form containing files for direct upload fields was submitted. |
| `direct-upload:initialize` | `<input>` | `{id, file}` | Dispatched for every file after form submission. |
| `direct-upload:start` | `<input>` | `{id, file}` | A direct upload is starting. |
| `direct-upload:before-blob-request` | `<input>` | `{id, file, xhr}` | Before making a request to your application for direct upload metadata. |
| `direct-upload:before-storage-request` | `<input>` | `{id, file, xhr}` | Before making a request to store a file. |
| `direct-upload:progress` | `<input>` | `{id, file, progress}` | As requests to store files progress. |
| `direct-upload:error` | `<input>` | `{id, file, error}` | An error occurred. An `alert` will display unless this event is canceled. |
| `direct-upload:end` | `<input>` | `{id, file}` | A direct upload has ended. |
| `direct-uploads:end` | `<form>` | None | All direct uploads have ended. |
2017-11-30 12:01:01 -05:00
### Example
You can use these events to show the progress of an upload.
To show the uploaded files in a form:
2017-11-30 12:19:57 -05:00
2017-11-30 12:01:01 -05:00
```js
// direct_uploads.js
addEventListener("direct-upload:initialize", event => {
const { target, detail } = event
const { id, file } = detail
target.insertAdjacentHTML("beforebegin", `
< div id = "direct-upload-${id}" class = "direct-upload direct-upload--pending" >
< div id = "direct-upload-progress-${id}" class = "direct-upload__progress" style = "width: 0%" > < / div >
< span class = "direct-upload__filename" > ${file.name}< / span >
< / div >
`)
})
addEventListener("direct-upload:start", event => {
const { id } = event.detail
const element = document.getElementById(`direct-upload-${id}`)
element.classList.remove("direct-upload--pending")
})
addEventListener("direct-upload:progress", event => {
const { id, progress } = event.detail
const progressElement = document.getElementById(`direct-upload-progress-${id}`)
progressElement.style.width = `${progress}%`
})
addEventListener("direct-upload:error", event => {
event.preventDefault()
const { id, error } = event.detail
const element = document.getElementById(`direct-upload-${id}`)
element.classList.add("direct-upload--error")
element.setAttribute("title", error)
})
addEventListener("direct-upload:end", event => {
const { id } = event.detail
const element = document.getElementById(`direct-upload-${id}`)
element.classList.add("direct-upload--complete")
})
```
2017-11-30 12:19:57 -05:00
Add styles:
2017-11-30 12:01:01 -05:00
```css
/* direct_uploads.css */
.direct-upload {
display: inline-block;
position: relative;
padding: 2px 4px;
margin: 0 3px 3px 0;
border: 1px solid rgba(0, 0, 0, 0.3);
border-radius: 3px;
font-size: 11px;
line-height: 13px;
}
.direct-upload--pending {
opacity: 0.6;
}
.direct-upload__progress {
position: absolute;
top: 0;
left: 0;
bottom: 0;
opacity: 0.2;
background: #0076ff ;
transition: width 120ms ease-out, opacity 60ms 60ms ease-in;
transform: translate3d(0, 0, 0);
}
.direct-upload--complete .direct-upload__progress {
opacity: 0.4;
}
.direct-upload--error {
border-color: red;
}
input[type=file][data-direct-upload-url][disabled] {
display: none;
}
```
2018-04-23 07:30:47 -04:00
### Integrating with Libraries or Frameworks
If you want to use the Direct Upload feature from a JavaScript framework, or
you want to integrate custom drag and drop solutions, you can use the
`DirectUpload` class for this purpose. Upon receiving a file from your library
of choice, instantiate a DirectUpload and call its create method. Create takes
a callback to invoke when the upload completes.
```js
import { DirectUpload } from "activestorage"
const input = document.querySelector('input[type=file]')
// Bind to file drop - use the ondrop on a parent element or use a
// library like Dropzone
const onDrop = (event) => {
event.preventDefault()
const files = event.dataTransfer.files;
Array.from(files).forEach(file => uploadFile(file))
}
// Bind to normal file selection
input.addEventListener('change', (event) => {
Array.from(input.files).forEach(file => uploadFile(file))
// you might clear the selected files from the input
input.value = null
})
const uploadFile = (file) {
// your form needs the file_field direct_upload: true, which
// provides data-direct-upload-url
const url = input.dataset.directUploadUrl
const upload = new DirectUpload(file, url)
upload.create((error, blob) => {
if (error) {
// Handle the error
} else {
// Add an appropriately-named hidden input to the form with a
// value of blob.signed_id so that the blob ids will be
// transmitted in the normal upload flow
const hiddenField = document.createElement('input')
hiddenField.setAttribute("type", "hidden");
hiddenField.setAttribute("value", blob.signed_id);
hiddenField.name = input.name
document.querySelector('form').appendChild(hiddenField)
}
})
}
```
If you need to track the progress of the file upload, you can pass a third
parameter to the `DirectUpload` constructor. During the upload, DirectUpload
will call the object's `directUploadWillStoreFileWithXHR` method. You can then
bind your own progress handler on the XHR.
```js
import { DirectUpload } from "activestorage"
class Uploader {
constructor(file, url) {
this.upload = new DirectUpload(this.file, this.url, this)
}
upload(file) {
this.upload.create((error, blob) => {
if (error) {
// Handle the error
} else {
// Add an appropriately-named hidden input to the form
// with a value of blob.signed_id
}
})
}
directUploadWillStoreFileWithXHR(request) {
request.upload.addEventListener("progress",
event => this.directUploadDidProgress(event))
}
directUploadDidProgress(event) {
// Use event.loaded and event.total to update the progress bar
}
}
```
2017-12-29 19:56:13 -05:00
Discarding Files Stored During System Tests
-------------------------------------------
2017-11-16 22:20:31 -05:00
System tests clean up test data by rolling back a transaction. Because destroy
is never called on an object, the attached files are never cleaned up. If you
want to clear the files, you can do it in an `after_teardown` callback. Doing it
2017-11-18 20:30:26 -05:00
here ensures that all connections created during the test are complete and
2017-12-16 00:04:54 -05:00
you won't receive an error from Active Storage saying it can't find a file.
2017-11-16 22:20:31 -05:00
2017-12-28 17:17:50 -05:00
```ruby
2017-11-16 22:20:31 -05:00
class ApplicationSystemTestCase < ActionDispatch::SystemTestCase
driven_by :selenium, using: :chrome, screen_size: [1400, 1400]
def remove_uploaded_files
FileUtils.rm_rf("#{Rails.root}/storage_test")
end
def after_teardown
super
remove_uploaded_files
end
end
```
2017-12-08 16:44:59 -05:00
If your system tests verify the deletion of a model with attachments and you're
2017-11-21 13:29:41 -05:00
using Active Job, set your test environment to use the inline queue adapter so
2017-11-16 22:20:31 -05:00
the purge job is executed immediately rather at an unknown time in the future.
You may also want to use a separate service definition for the test environment
so your tests don't delete the files you create during development.
2017-12-28 17:17:50 -05:00
```ruby
2017-11-16 22:20:31 -05:00
# Use inline job processing to make things happen immediately
config.active_job.queue_adapter = :inline
# Separate file storage in the test environment
config.active_storage.service = :local_test
```
2018-02-15 16:30:15 -05:00
Discarding Files Stored During Integration Tests
-------------------------------------------
Similarly to System Tests, files uploaded during Integration Tests will not be
automatically cleaned up. If you want to clear the files, you can do it in an
`after_teardown` callback. Doing it here ensures that all connections created
during the test are complete and you won't receive an error from Active Storage
saying it can't find a file.
```ruby
module ActionDispatch
class IntegrationTest
def remove_uploaded_files
FileUtils.rm_rf(Rails.root.join('tmp', 'storage'))
end
def after_teardown
super
remove_uploaded_files
end
end
end
```
2017-12-29 19:56:13 -05:00
Implementing Support for Other Cloud Services
---------------------------------------------
2017-11-16 22:07:10 -05:00
2017-12-08 16:44:59 -05:00
If you need to support a cloud service other than these, you will need to
implement the Service. Each service extends
2017-11-16 22:07:10 -05:00
[`ActiveStorage::Service` ](https://github.com/rails/rails/blob/master/activestorage/lib/active_storage/service.rb )
by implementing the methods necessary to upload and download files to the cloud.