|
|
||
|---|---|---|
| .. | ||
| database.md | ||
| gitlab.md | ||
| load_balancer.md | ||
| nfs.md | ||
| README.md | ||
| redis.md | ||
| redis_source.md | ||
High Availability
GitLab supports several different types of clustering and high-availability. The solution you choose will be based on the level of scalability and availability you require. The easiest solutions are scalable, but not necessarily highly available.
Architecture
There are two kinds of setups:
- active/active
- active/passive
Active/Active
This architecture scales easily because all application servers handle user requests simultaneously. The database, Redis, and GitLab application are all deployed on separate servers. The configuration is only highly-available if the database, Redis and storage are also configured as such.
Follow the steps below to configure an active/active setup:
- Configure the database
- Configure Redis
- Configure NFS
- Configure the GitLab application servers
- Configure the load balancers

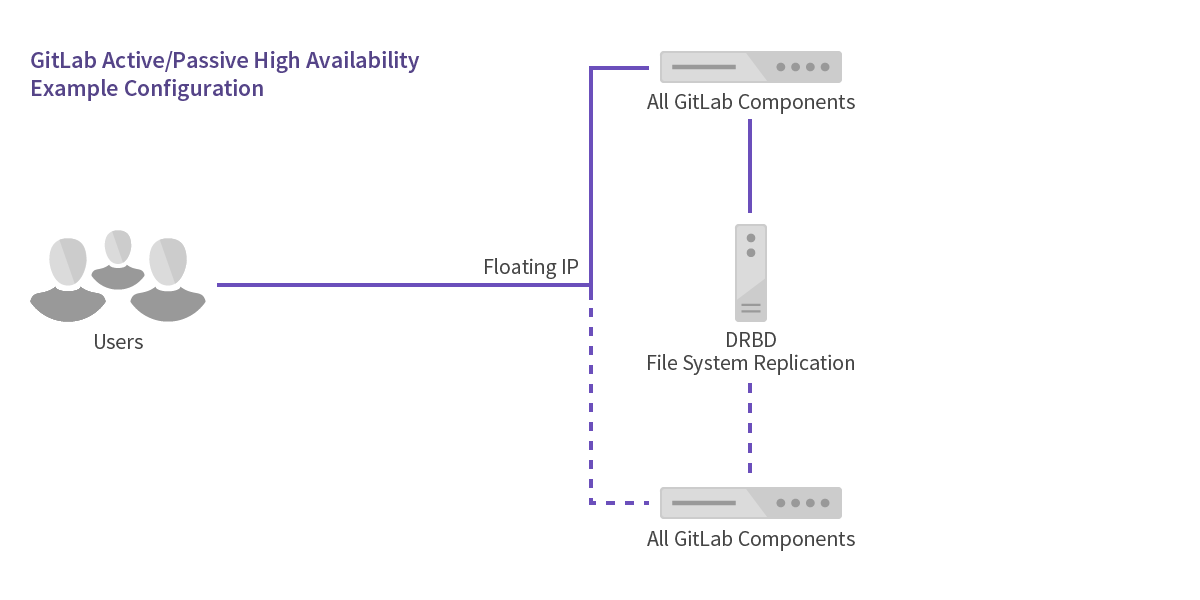
Active/Passive
For pure high-availability/failover with no scaling you can use an active/passive configuration. This utilizes DRBD (Distributed Replicated Block Device) to keep all data in sync. DRBD requires a low latency link to remain in sync. It is not advisable to attempt to run DRBD between data centers or in different cloud availability zones.
Components/Servers Required: 2 servers/virtual machines (one active/one passive)