fixing links after moving surfacing tutorials

fixing more links for the newly located tutorials

WIP: merging 3 getting started tutorials into one to cover all platforms, added new files

fixing broken images and links in 3-in-1 getting started, re-wrote story flow, linked to Toolbox, d4mac,d4win

Signed-off-by: Victoria Bialas <victoria.bialas@docker.com>
8.5 KiB
Tag, push, and pull your image
In this section, you tag and push your docker-whale image to your newly
created repository. When you are done, you test the repository by pulling your
new image.
Step 1: Tag and push the image
If you don't already have a terminal open, open one now:
-
Go back to your command line terminal.
-
At the prompt, type
docker imagesto list the images you currently have:$ docker images REPOSITORY TAG IMAGE ID CREATED VIRTUAL SIZE docker-whale latest 7d9495d03763 38 minutes ago 273.7 MB <none> <none> 5dac217f722c 45 minutes ago 273.7 MB docker/whalesay latest fb434121fc77 4 hours ago 247 MB hello-world latest 91c95931e552 5 weeks ago 910 B -
Find the
IMAGE IDfor yourdocker-whaleimage.In this example, the id is
7d9495d03763.Notice that currently, the
REPOSITORYshows the repo namedocker-whalebut not the namespace. You need to include thenamespacefor Docker Hub to associate it with your account. Thenamespaceis the same as your Docker Hub account name. You need to rename the image toYOUR_DOCKERHUB_NAME/docker-whale. -
Use
IMAGE IDand thedocker tagcommand to tag yourdocker-whaleimage.The command you type looks like this:
Of course, your account name will be your own. So, you type the command with your image's ID and your account name and press RETURN.
$ docker tag 7d9495d03763 maryatdocker/docker-whale:latest -
Type the
docker imagescommand again to see your newly tagged image.$ docker images REPOSITORY TAG IMAGE ID CREATED VIRTUAL SIZE maryatdocker/docker-whale latest 7d9495d03763 5 minutes ago 273.7 MB docker-whale latest 7d9495d03763 2 hours ago 273.7 MB <none> <none> 5dac217f722c 5 hours ago 273.7 MB docker/whalesay latest fb434121fc77 5 hours ago 247 MB hello-world latest 91c95931e552 5 weeks ago 910 B -
Use the
docker logincommand to log into the Docker Hub from the command line.The format for the login command is:
docker login --username=yourhubusername --email=youremail@company.comWhen prompted, enter your password and press enter. So, for example:
$ docker login --username=maryatdocker --email=mary@docker.com Password: WARNING: login credentials saved in C:\Users\sven\.docker\config.json Login Succeeded -
Type the
docker pushcommand to push your image to your new repository.$ docker push maryatdocker/docker-whale The push refers to a repository [maryatdocker/docker-whale] (len: 1) 7d9495d03763: Image already exists c81071adeeb5: Image successfully pushed eb06e47a01d2: Image successfully pushed fb434121fc77: Image successfully pushed 5d5bd9951e26: Image successfully pushed 99da72cfe067: Image successfully pushed 1722f41ddcb5: Image successfully pushed 5b74edbcaa5b: Image successfully pushed 676c4a1897e6: Image successfully pushed 07f8e8c5e660: Image successfully pushed 37bea4ee0c81: Image successfully pushed a82efea989f9: Image successfully pushed e9e06b06e14c: Image successfully pushed Digest: sha256:ad89e88beb7dc73bf55d456e2c600e0a39dd6c9500d7cd8d1025626c4b985011 -
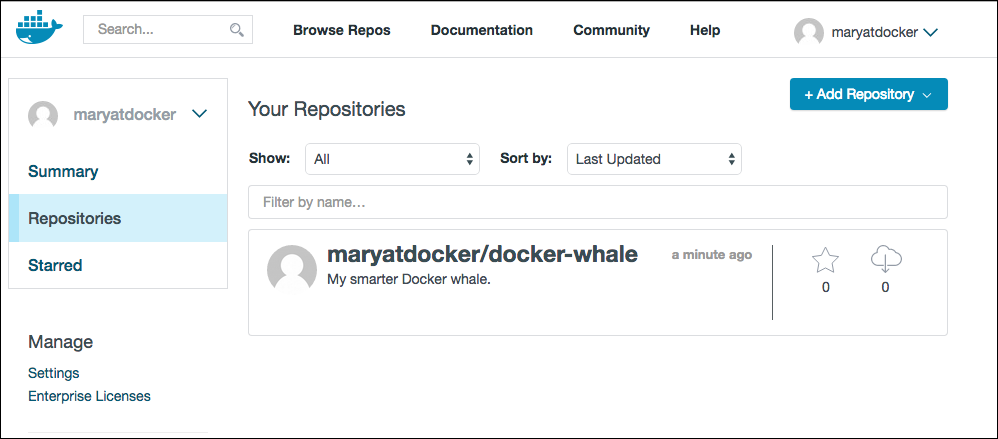
Return to your profile on Docker Hub to see your new image.
Step 2: Pull your new image
In this last section, you'll pull the image you just pushed to hub. Before you do that though, you'll need to remove the original image from your local machine. If you left the original image on your machine. Docker would not pull from the hub — why would it? The two images are identical.
-
Make sure Docker is running, and open a command line terminal.
-
At the prompt, type
docker imagesto list the images you currently have on your local machine.$ docker images REPOSITORY TAG IMAGE ID CREATED VIRTUAL SIZE maryatdocker/docker-whale latest 7d9495d03763 5 minutes ago 273.7 MB docker-whale latest 7d9495d03763 2 hours ago 273.7 MB <none> <none> 5dac217f722c 5 hours ago 273.7 MB docker/whalesay latest fb434121fc77 5 hours ago 247 MB hello-world latest 91c95931e552 5 weeks ago 910 BTo make a good test, you need to remove the
maryatdocker/docker-whaleanddocker-whaleimages from your local system. Removing them forces the nextdocker pullto get the image from your repository. -
Use the
docker rmito remove themaryatdocker/docker-whaleanddocker-whaleimages.You can use an ID or the name to remove an image.
$ docker rmi -f 7d9495d03763 $ docker rmi -f docker-whale -
Pull and load a new image from your repository using the
docker runcommand.The command you type should include your username from Docker Hub.
docker run yourusername/docker-whaleSince the image is no longer available on your local system, Docker downloads it.
 $ docker run maryatdocker/docker-whale
 Unable to find image 'maryatdocker/docker-whale:latest' locally
 latest: Pulling from maryatdocker/docker-whale
 eb06e47a01d2: Pull complete
 c81071adeeb5: Pull complete
 7d9495d03763: Already exists
 e9e06b06e14c: Already exists
 a82efea989f9: Already exists
 37bea4ee0c81: Already exists
 07f8e8c5e660: Already exists
 676c4a1897e6: Already exists
 5b74edbcaa5b: Already exists
 1722f41ddcb5: Already exists
 99da72cfe067: Already exists
 5d5bd9951e26: Already exists
 fb434121fc77: Already exists
 Digest: sha256:ad89e88beb7dc73bf55d456e2c600e0a39dd6c9500d7cd8d1025626c4b985011
 Status: Downloaded newer image for maryatdocker/docker-whale:latest
  ________________________________________
 / Having wandered helplessly into a      \
 | blinding snowstorm Sam was greatly     |
 | relieved to see a sturdy Saint Bernard |
 | dog bounding toward him with the       |
 | traditional keg of brandy strapped to  |
 | his collar.                            |
 |                                        |
 | "At last," cried Sam, "man's best      |
 \ friend -- and a great big dog, too!"   /
  ----------------------------------------
                 \
                  \
                   \
                           ##        .
                     ## ## ##       ==
                  ## ## ## ##      ===
              /""""""""""""""""___/ ===
         ~~~ {~~ ~~~~ ~~~ ~~~~ ~~ ~ /  ===- ~~~
              \______ o          __/
               \    \        __/
                 \____\______/
Where to go next
You've done a lot, you've done all of the following fundamental Docker tasks.
- installed Docker
- run a software image in a container
- located an interesting image on Docker Hub
- run the image on your own machine
- modified an image to create your own and run it
- create a Docker Hub account and repository
- pushed your image to Docker Hub for others to share
You've only scratched the surface of what Docker can do. Go to the next page to learn more.

