12 KiB
Installing GitLab on AWS
GitLab can be installed on Amazon Web Services (AWS) by using the official AMIs provided with each release.
Introduction
In this guide, we will explore the simplest way to install GitLab on AWS using the Omnibus GitLab package. That means that this will be a single EC2 node, and all GitLab's components, including the database, will be hosted on the same instance.
If you are interested for a highly available environment, check the high availability docs.
Requirements
A basic familiarity with AWS and EC2 is assumed. In particular, you will need:
- An AWS account
- Create or upload an SSH key to connect to the instance via SSH
- A domain name under which GitLab will be reached
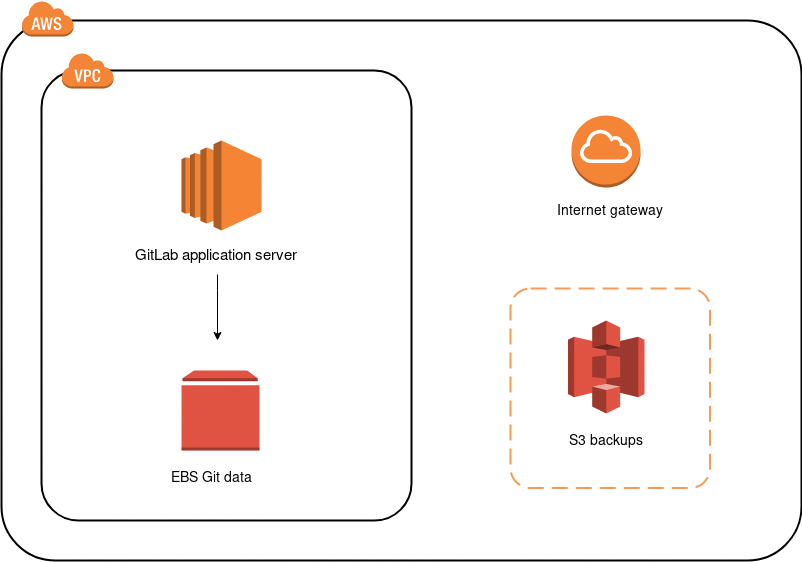
Architecture
Below is the diagram of the architecture.
Costs
Based on GitLab's requirements, the
instance type should be at least c4.xlarge. This is enough to accommodate 100 users.
Here's a list of the services we will use and their costs:
- EC2: GitLab will deployed on shared hardware which means on-demand pricing will apply. If you want to run it on a dedicated or reserved instance, consult the EC2 pricing page for more information on the cost.
- EBS: We will also use an EBS volume to store the Git data. See the Amazon EBS pricing.
- S3: We will use S3 to store backups. See the Amazon S3 pricing.
- ALB: An Application Load Balancer will be used to route requests to the GitLab instance. See the Amazon ELB pricing.
Security
We will create a new IAM role specifically for deploying GitLab, a new VPC, as well as a security group with limited port access to the instance.
Creating an IAM EC2 instance role and profile
To minimize the permissions of the user, we'll create a new IAM role with limited access:
-
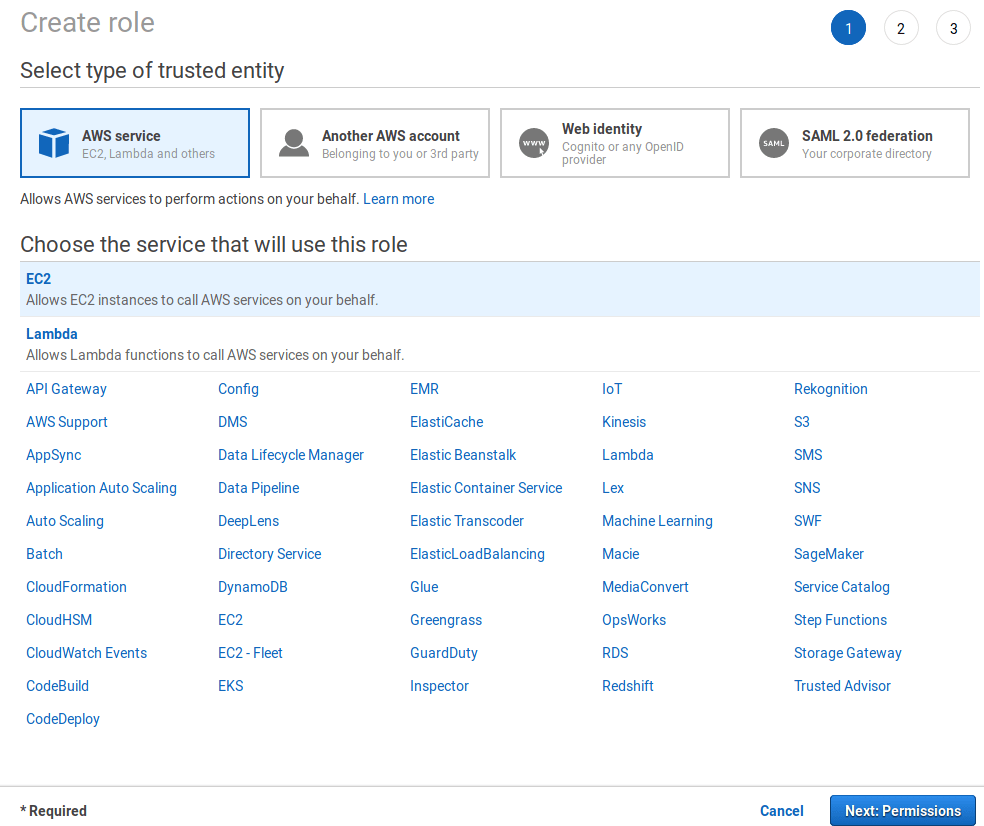
Navigate to the IAM dashboard https://console.aws.amazon.com/iam/home and click on Create role.
-
Create a new role by choosing to AWS service > EC2. Once done, click on Next: Permissions.
-
Choose AmazonEC2FullAccess and AmazonS3FullAccess and click on Next: Review.
-
Give the role the name
GitLabAdminand click Create role.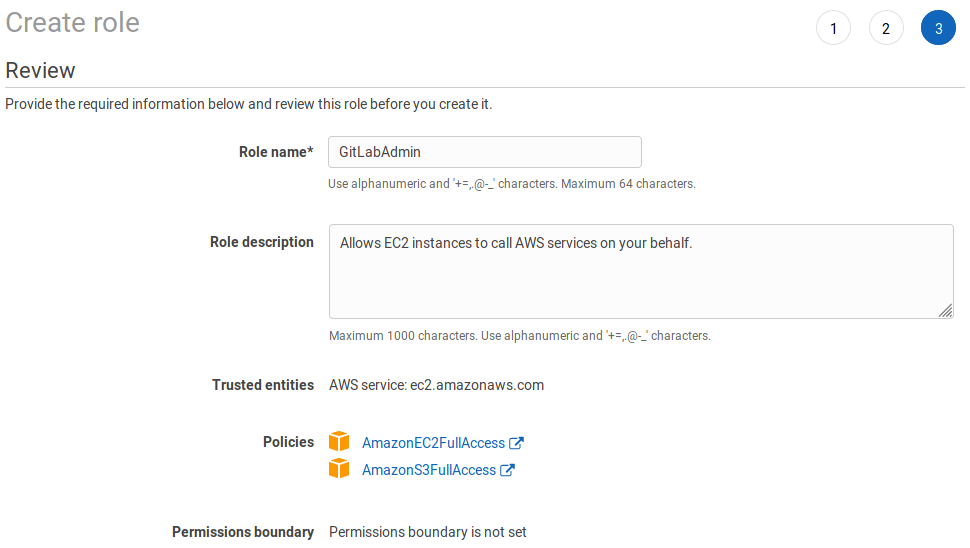
Configuring the network
We'll start by creating a VPC for our GitLab cloud infrastructure, then we can create subnets to have public and private instances. Public subnets will require a Route Table and an associated Internet Gateway.
Let's create a VPC:
-
Navigate to https://console.aws.amazon.com/vpc/home
-
Select Your VPCs from the left menu and then click on Create VPC. At the name tag enter
gitlab-vpcand at the IPv4 CIDR block enter10.0.0.0/16. Click Yes, Create when ready.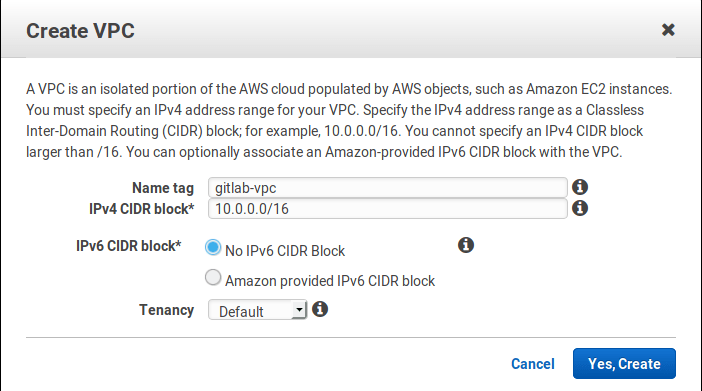
Now, onto creating a subnet:
-
Select Subnets from the left menu.
-
Click on Create subnet. Give it a descriptive name tag based on the IP, for example
gitlab-subnet-10.0.0.0, select the VPC we created previously, and at the IPv4 CIDR block let's give it a 24 subnet10.0.0.0/24: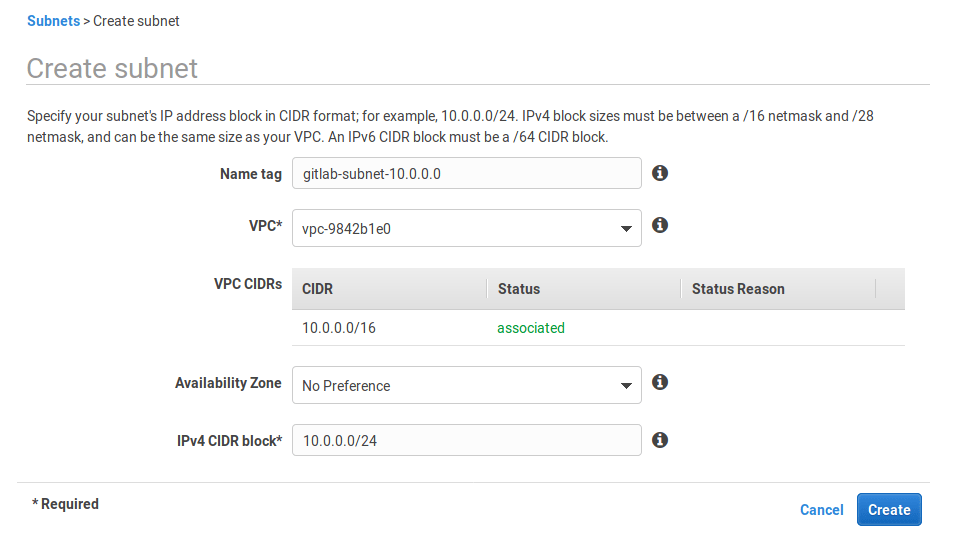
Since the newly created subnet is private, we need to create a Route Table to associate an Internet Gateway:
- Select Route Tables from the left menu.
- Click Create Route Table.
- At the "Name tag" enter
gitlab-publicand choosegitlab-vpcunder "VPC". - Hit Yes, Create.
Now, create the Internet gateway:
-
Select Internet Gateways from the left menu.
-
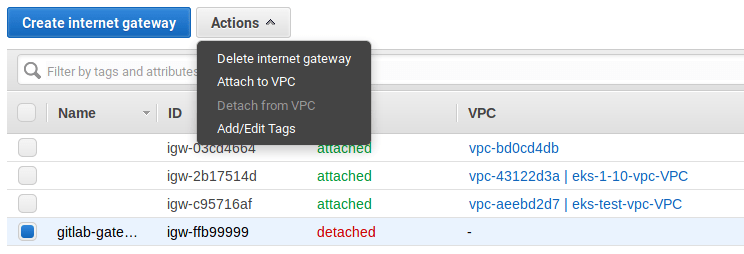
Click on Create internet gateway, give it the name
gitlab-gatewayand click Create. -
Select it from the table, and then under the Actions dropdown choose "Attach to VPC".
-
Choose
gitlab-vpcfrom the list and hit Create.
Now it's time to add the route to the subnet:
-
Select Route Tables from the left menu and click on the
gitlab-publicroute to show the options at the bottom. -
Select the Routes tab, hit Edit > Add another route and set
0.0.0.0/0as destination. In the target, select thegitlab-gatewaywe created previously. Hit Save once done.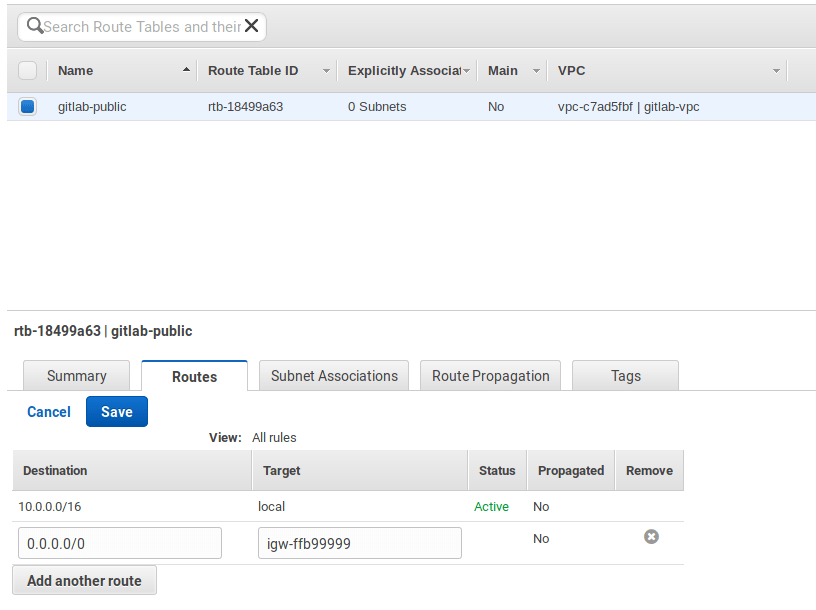
-
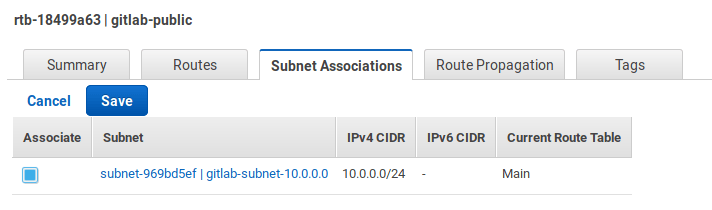
Select the Subnet Associations tab and hit Edit.
-
Check the subnet and hit Save.
Now that we're done with the network, let's create a security group.
Creating a security group
The security group is basically the firewall.
-
Select Security Groups from the left menu.
-
Click on Create Security Group and fill in the details. Give it a name, add a description, choose the VPC we created previously, and finally, add the inbound rules. You will need to open the SSH, HTTP, HTTPS ports. Leave the outbound traffic as is.
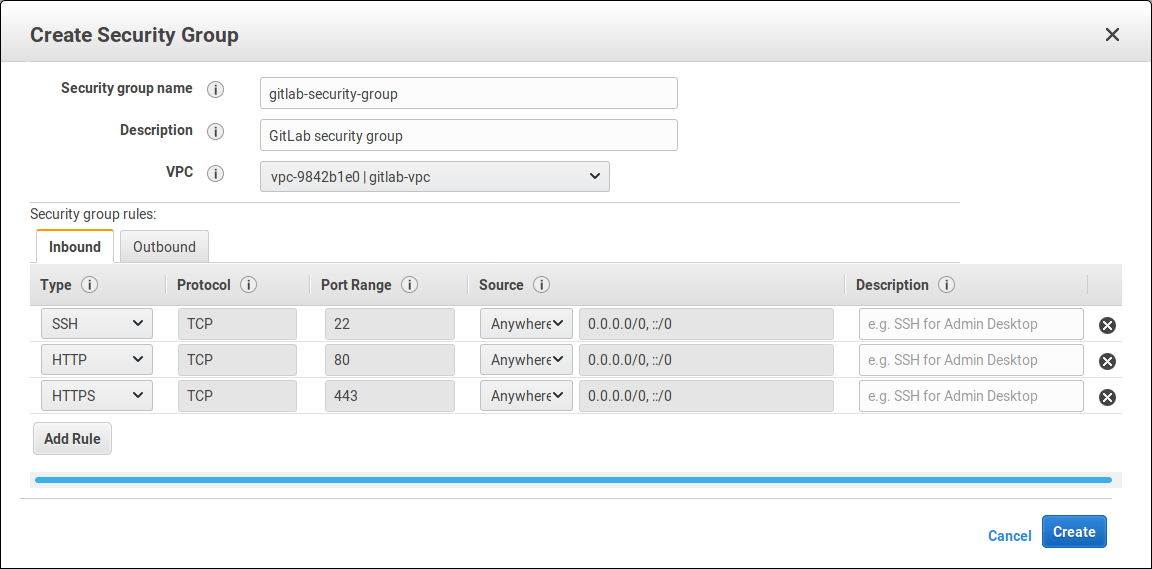
TIP: Tip: Based on best practices, you should only allow SSH traffic from only a known host or CIDR block. In that case, change the SSH source to be custom and give it the IP you want to SSH from.
-
When done, click on Create.
Now that we have set up security, let's deploy GitLab.
Deploying GitLab
We'll use AWS's wizard to deploy GitLab and then SSH into the instance to configure the domain name.
Choose the AMI
-
On the EC2 dashboard click Launch Instance.
-
Choose the AMI by going to the Community AMIs and search for
GitLab EE <version>where<version>the latest version as seen in the releases page.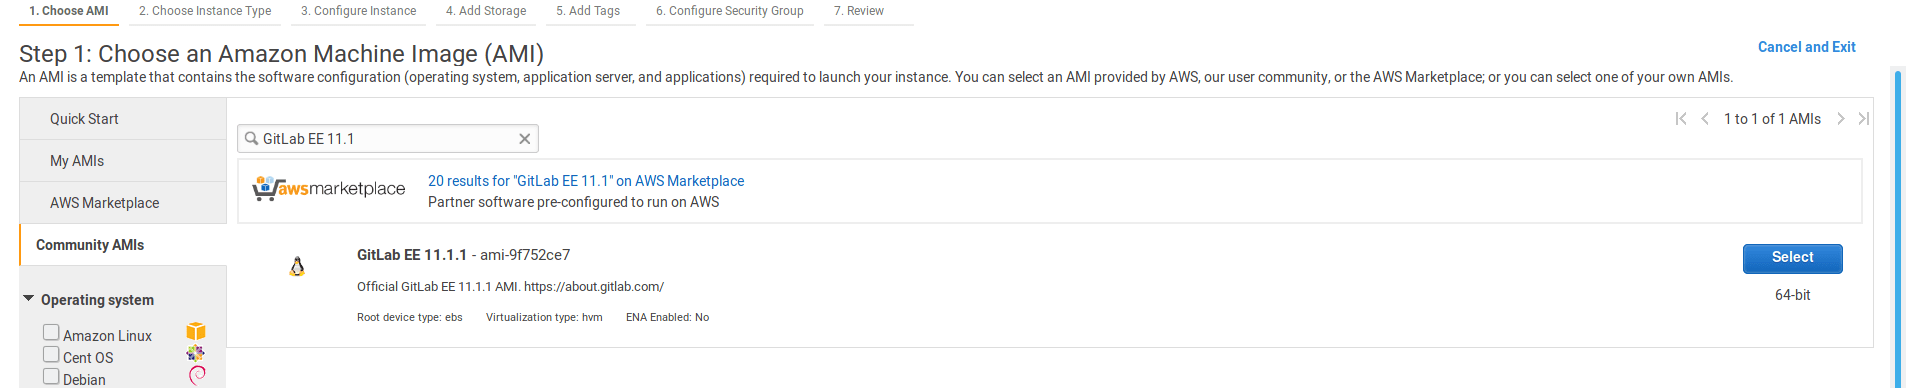
Choose instance type
-
Choose the
c4.xlargeinstance.
-
Click Next: Configure Instance Details
Configure instance
-
Configure the instance. At "Network" choose
gitlab-vpcand the subnet we created for that VPC. Select "Enable" for the "Auto-assign Public IP" and choose theGitLabAdminIAM role.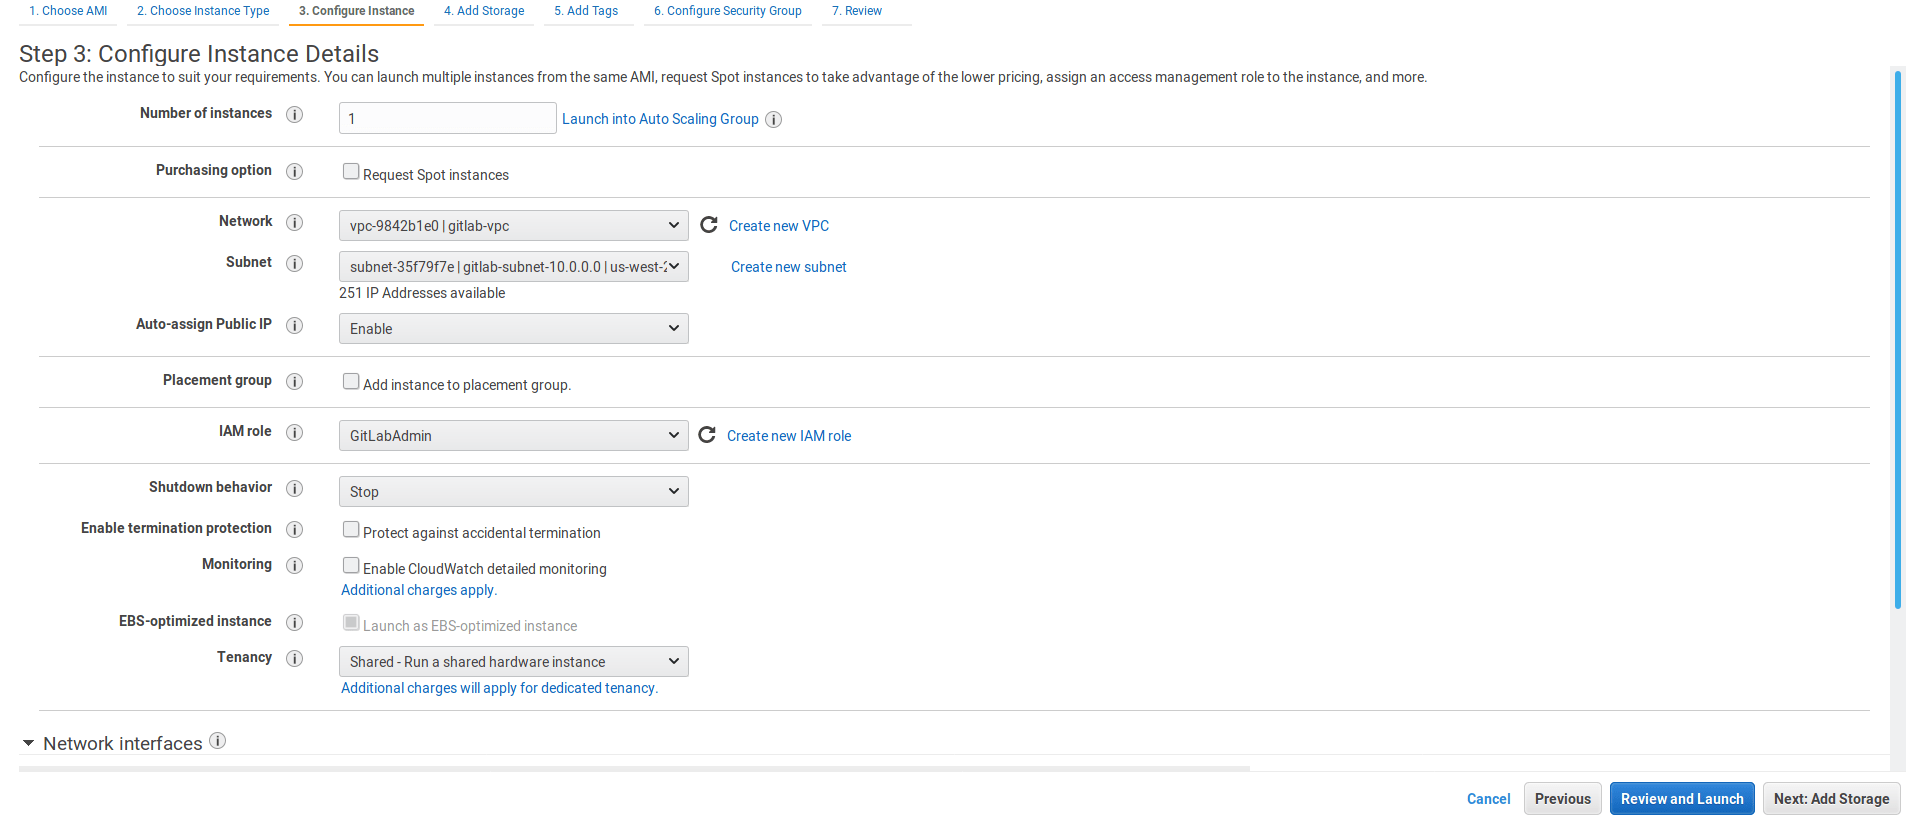
-
Click Next: Add Storage.
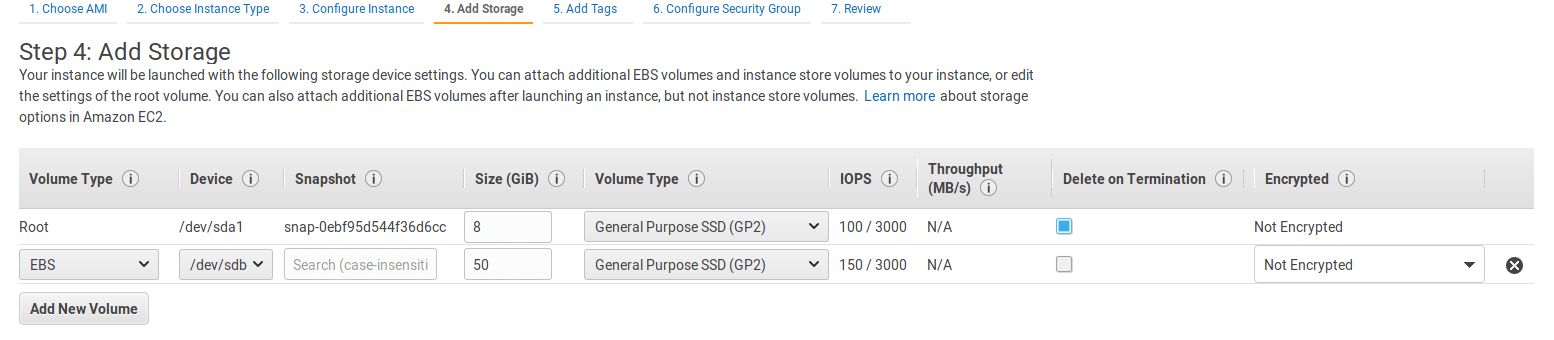
Add storage
Edit the root volume to 20GB, and add a new EBS volume that will host the Git data. Its size depends on your needs and you can always migrate to a bigger volume later.
Add tags
To help you manage your instances, you can optionally assign your own metadata to each resource in the form of tags.
Let's add one with its key set to Name and value to GitLab.

Configure security group
-
Select the existing security group we have created.
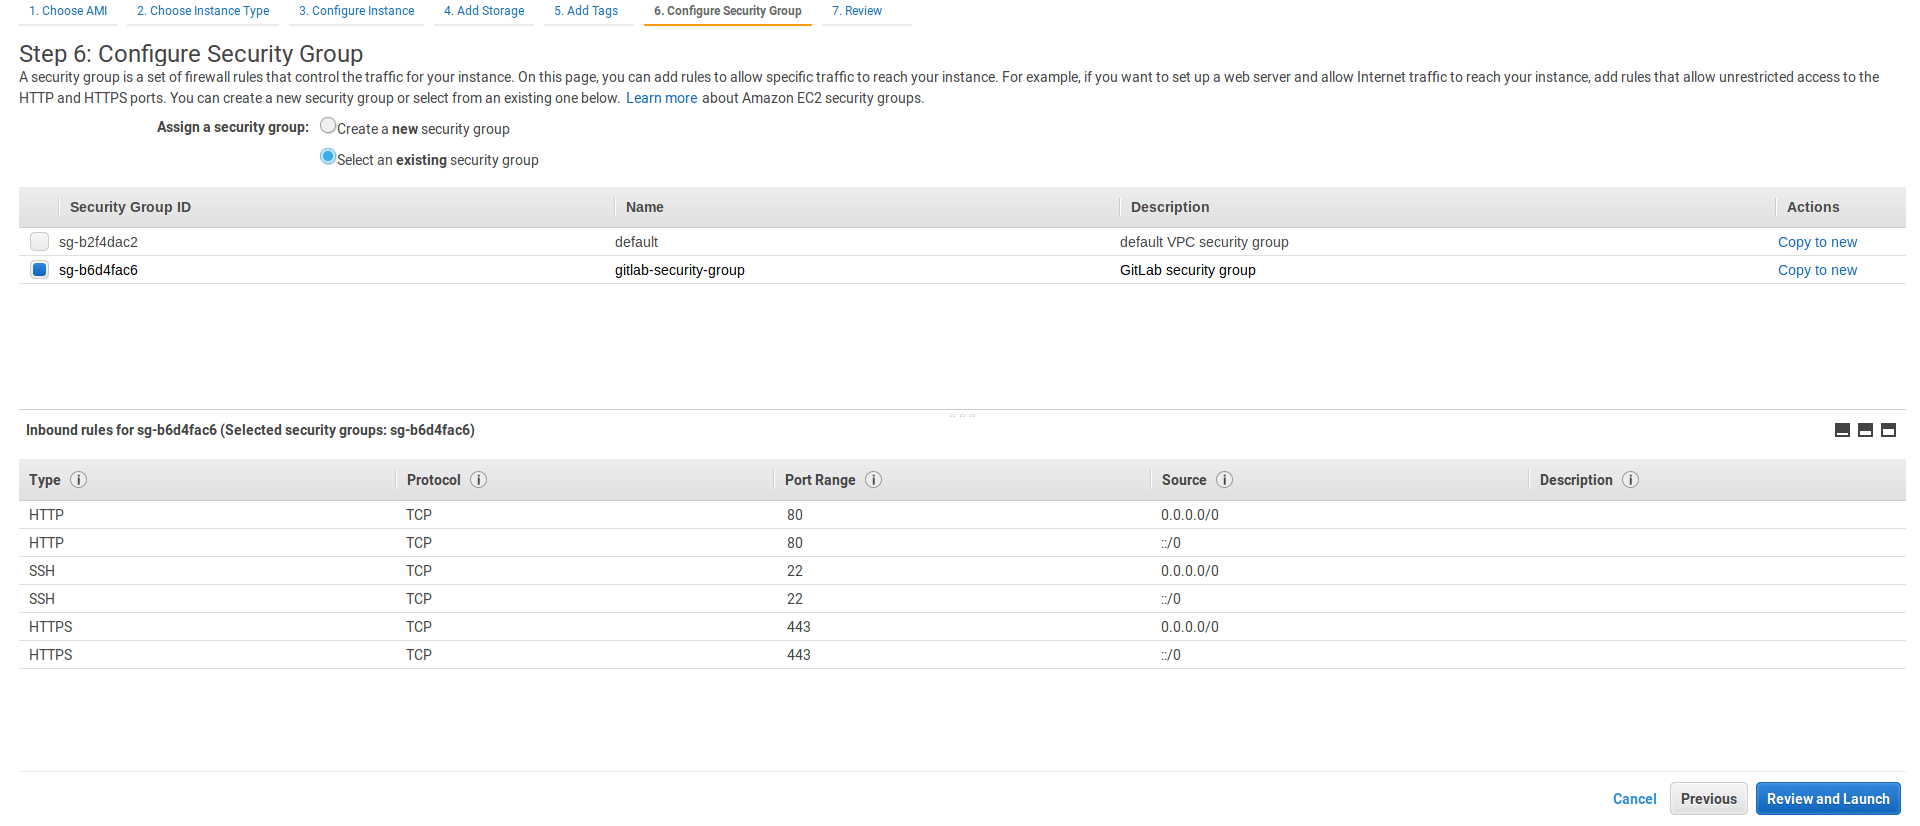
-
Select Review and Launch.
Review and launch
Now is a good time to review all the previous settings. Click Launch and select the SSH key pair you have created previously.
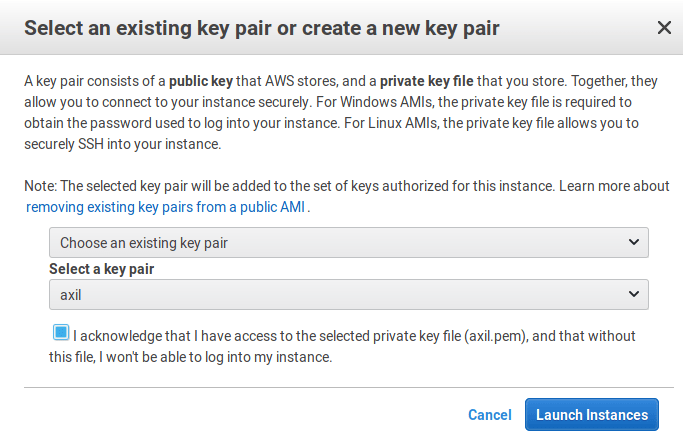
Finally, click on Launch instances.
After deployment
After a few minutes, the instance should be up and accessible via the internet. Let's connect to it and configure some things before logging in.
Setting up the EBS volume
The EBS volume will host the Git data. We need to first format the /dev/xvdb
volume and then mount it:
-
First, create the directory that the volume will be mounted to:
sudo mkdir /gitlab-data -
Create a partition with a GUID Partition Table (GPT), mark it as primary, choose the
ext4file system, and use all its size:sudo parted --script /dev/xvdb mklabel gpt mkpart primary ext4 0% 100% -
Format to
ext4:sudo mkfs.ext4 -L Data /dev/xvdb1 -
Find its PARTUUID:
blkid /dev/xvdb1You need to copy the PARTUUID number (without the quotes) and use this to mount the newly created partition.
-
Open
/etc/fstabwith your editor, comment out the entry about/dev/xvdb, and add the new partition:PARTUUID=d4129b25-a3c9-4d2c-a090-2c234fee4d46 /gitlab-data ext4 defaults,nofail,x-systemd.requires=cloud-init.service,comment=cloudconfig 0 2 -
Mount the partition:
sudo mount -a
Now that the partition is created and mounted, it's time to tell GitLab to store
its data to the new /gitlab-data directory:
-
Edit
/etc/gitlab/gitlab.rbwith your editor and add the following:git_data_dirs({ "default" => { "path" => "/gitlab-data" } }) -
Save the file and reconfigure GitLab:
sudo gitlab-ctl reconfigure
Read more on storing Git data in an alternative directory.
LFS objects on S3
If you intend to use Git LFS, you can store the LFS objects in S3.
Setting up a domain name
After you SSH into the instance, configure the domain name:
-
Open
/etc/gitlab/gitlab.rbwith your favorite editor. -
Edit the
external_urlvalue:external_url 'http://example.com' -
Reconfigure GitLab:
sudo gitlab-ctl reconfigure
You should now be able to reach GitLab at the URL you defined. To use HTTPS (recommended), see the HTTPS documentation.
Logging in for the first time
If you followed the previous section, you should be now able to visit GitLab
in your browser. The very first time, you will be asked to set up a password
for the root user which has admin privileges on the GitLab instance.
After you set it up, login with username root and the newly created password.
Backup and restore
GitLab provides a tool to backup and restore its Git data, database, attachments, LFS objects, etc.
Some things to know:
- By default, the backup files are stored locally, but you can backup GitLab using S3.
- You can exclude specific directories form the backup.
- The backup/restore tool does not store some configuration files, like secrets, you'll need to do it yourself.
Backing up GitLab
To backup GitLab:
-
SSH into your instance.
-
Take a backup:
sudo gitlab-rake gitlab:backup:create
Restoring GitLab from a backup
To restore GitLab, first check the restore documentation and mainly the restore prerequisites. Then, follow the steps under the Omnibus installations section.
Updating GitLab
GitLab releases a new version every month on the 22nd. Whenever a new version is released, you can update your GitLab instance:
-
SSH into your instance
-
Take a backup:
sudo gitlab-rake gitlab:backup:create -
Update the repositories and install GitLab:
sudo apt update
sudo apt install gitlab-ee
After a few minutes, the new version should be up and running.
Resources
- Omnibus GitLab - Everything you need to know about administering your GitLab instance.
- Upload a license - Activate all GitLab Enterprise Edition functionality with a license.